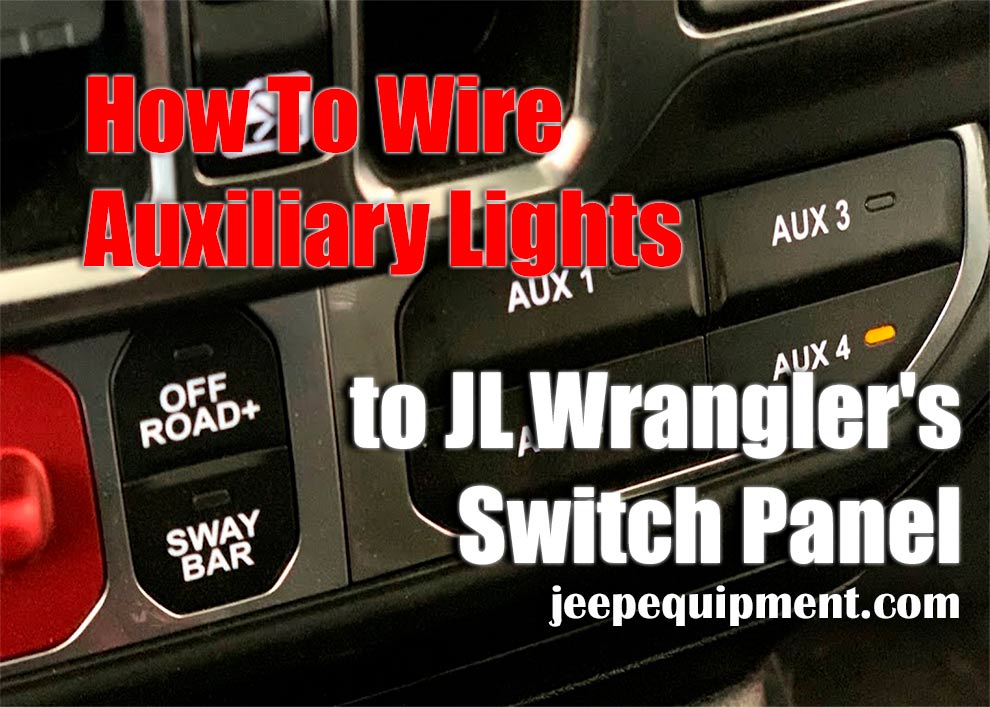
Hi guys! Today we’re going to talk about how to hook up optional accessories to the factory add-on switches that you get as part of an option pack in your 2018 g / l. Alright, let’s jump right in and see how to wire Auxiliary Exterior Lights for Jeep‘s Factory Switch Panel!
The Control Panel
The control panel I’m talking about is giving you four switches built right into the JL. So, in generations of the past, if you wanted to hook up lights, compressors, lockers, and air horns, you had to add switches to the Jeep so that you either drilled into some of the trim or has a control panel on the A-pillar or elsewhere in the vehicle, that is Jeep decided to give the switches as part of an option pack. Moreover, they will be fused, they will also have 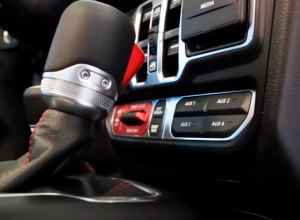 relays built in and just put in the ends of the wires that you can tie up so you have a total of four circuits that you put into these four. You can tie in circuits either under the dash on the passenger side for anything you would need to turn on the interior of the Jeep like any kind of extra auxiliary lights inside, if you have a compressor that mounts inside the vehicle or a cell that does sucks for air lockers. Anything you want inside, you can tie them in there and then just one more leg to tie into the outside of the jeep under the hood, so for all of your outside stuff your accessory lights will be whatever you want to put on the outside.
These switches, as I said, are in an option package available, and this package is the trailer coupling and the HD electrical package. So, what you get with it is things like a 2-inch Class 2 receiver on the back of the Jeep to tow a 4 and 7 pin electrical connector for your trailer wiring, you get a bigger alternator and a bigger amperage battery, but this will the part you will really see inside the Jeep switchboard. The way that works is very simple, they have the wire inside, they have them under the hood and I want to discuss with you how to tie exhilarating accessories to it and then you can actually program how this switch directly works. I will tell you how to actually do the wiring then how to connect everything on the screen you are connecting and test the lights.
How Can You Do the Wiring?
-
As I said earlier, there are two different places that you can attach to the cables that are different for these four. There are switches provided, one is under the dash, but I think most of you will be under the engine bay because I think a lot of you will be using these switches for things like lights that are obviously on the outside of the Jeeps are located, so the cables are bundled up very neatly and factory-connected right between the battery and the inside of the passenger-side fender.
-
Well, all you need is just cut the little piece of tape that Jeep from the factory put there to prevent it from getting tangled, and then cut the sheath off of them to expose the wires. This is how the wires look, you’re going to be looking under your engine bay and as you can see they are all taped off very neatly by Jeep, so just cut off a bit of it so you can actually do it.
-
 Take a look at the wires for yourself. Once you get the reaching strip back you can actually see the four different wires and what you have are auxiliary switches one and two which are beige and green respectively and they will be a little thicker wiring that are 40-amp circuits. So, they will be for things that need a bit more power like your compressors, maybe your winch, if you want an extra cut-off. For this you would use a circuit with greater strength and then you will have your orange and dark blue aux cables 3 and 4 respectively and these are going to be 15A circuits so they are going to be a little smaller, and going to be more than enough for your lights and smaller accessories.
 -
Then grab some lights and I will let you know how to use these. Firstly, connect to the wires so that out of the box your lights really fall into one of two categories. You will either be something like this Raxiom Seven-and-a-half-inch double row LED light bar where you only have a two-wire pigtail, there won’t be any type of wiring harness or anything like that and it might be a little more obvious to you how you would connect something like that to the wires.
-
The other way you’ll find things out of the box is something like this Slim Light from Casey. This is a slim diffuse pattern lamp from Casey and this comes with a weatherproof plug right on the end of the light and it comes with a harness that accepts this connector. So, there are things like a fuse and relay built into that harness. You might be wondering if I can still use my auxiliary switches with something like that. And the answer is absolutely yes! You can plug these three wires as part of the Casey wire and harness right into the switch provided by Casey and connect them to your factory auxiliary switch wiring so things will now work on this Casey wiring harness.
-
You actually have three wires in total as this has a lighted switch and connects the hot wire to your auxiliary switch wire line. Well, we’re going to trade today for this smaller light bar just because it’s a bit easier to use. As an example like I said, this raxiom light bar that has two wires, of course if you actually do this and it wasn’t just an example you would put your light on first to find out exactly where you need that, and you would extend these wires so you could run them up to this area to make your connections for your panel without them getting anywhere hot or anything moving around the circuit here.
The auxiliary number is three and the reason is that it’s a 15-amp circuit and that’s all you need for this little light here. You certainly don’t need the bigger 40-amp gauge so just go with this. You also need a couple of tools, a set of wire strippers, wire cutters, and some connectors. Also some electrical tape and a little electrical outlet, I’ll tell you why in a second need that, so when you’re just going to start cutting off that little protective piece that comes off the factory on the cable, so it isn’t propped up against anything when you lean on the switches on the inside that do everything can connect here so it’s really easy to just cut that off and now all that’s going to do is cut down on that scam, just a little bit more to give me a little bit more room to work here so we exposed our wire.
Detailed Instructions
-
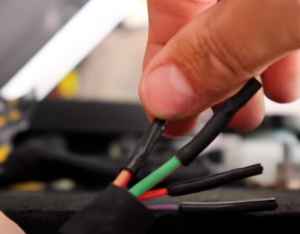
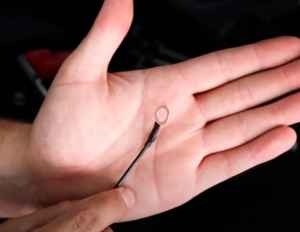
 Firstly, all you need to do is peel a little bit of the insulation off the end of this wire so you can attach a crimp and you can expose the copper. There you have to put the plunger right over it and crimp that, if you use the crimp part of our stripping tool here to do that, that’s the only connection you have.
 -
Go on working on this harness, so of course you can go ahead! Let’s heat the end of the plug, you can heat shrink, the end of the plug, glue everything else out of the way, make it nice and neat. The other end of the connection is natural to your light itself. Now led lights are polarized which means that you need to make a connection to be positive with the positive side and be grounded on the ground side.
-
Well the red is the positive connected, so let’s go ahead and do the same thing just to expose a bit more. Wire just that right into the other end of our butts where we shit it all together. You can heat shrink so that you can glue it all on to make it nice.
-
The only other connection you need here on the other side of the wire and that will be the bottom. So, in the area of the GP there are a lot of different reasons to choose from, you really can use any of them. First things first, we’ll reveal a bit more of this wire too.
-
Then crimp this eyelet so you can put it under one of those many ground points, same situation here: shrink tape, clean everything up and then you have a ten-millimeter socket that you will make go ahead and loosen this nut from the factory.
-
Put the eyelet on the bolt and tighten the nut. All you have to do is ground your light right on the body and you can really do that anywhere. Then connect the 12 volt hot side of your light – whatever circuit you want to use in your auxiliary wiring harness. After that you just have to dive
 into the Jeep and choose how this switch is supposed to work through the UConnect system. You have all the cables connected and what you can do is choose how these switches are actually supposed to work, and do so through the UConnect system.
 -
You can go into your settings and then aux switches and this is where you make your selections. So, you have everything connected to Ops 3 again as this was the first 15-amp circuit. So, we go into aux three options and again you have a couple of different choices to make:
-
Here you can set the type of toggle between Snap-In and Momentary. A snap is probably what most of you will be using for lighting. That means you press the button once and it will continue to send power to that wire until you press the button again.
-
You can also now select a moment that is for possibly a light that has its own type of circuit built in which you only need to send power once. Then it’s powered up for a relay, maybe or some other example. I can imagine if you had an air horn, you want to set your button to be 12 volts when you press it, when you let go of it is whether you want battery power or ignition current, so battery power just means that every time this button is pressed, this light comes on in the case, regardless of whether the ignition is on or not.
-
The light comes on when the ignition is turned off, the lights go out and this is a great way to save your battery. So, if you have a lot of lights, turn off the jeep, get out and go somewhere and you get this on the battery. These lights while the battery is igniting makes it all turn off and if you have the ignition selected you have the option too to switch your last status request on or off.
-
When you have the lights on, just switch off the jeep and go away of course the light goes off in ignition mode when you get back into the jeep and start again the light goes on again – it is less of a state or it stays off until you press the button. That’s the third option to go to. To do this, you have these three options for all four switches, so you can set them up to work exactly the way you want them to Ops three is Select Type Lashing because it’s a light that you need as a power source for the ignition. The last callback state again, the light won’t come on again, that’s just a preference for this light you hooked up as an example, so let’s go further and press the X back to the home screen and then you can reach down and press ox-3 and turn on our light and off.
That’s It!
Everything works exactly as it should, so I think many of you will make very good use of this option. Make sure to comment below and let me know exactly what you used your auxiliary switches on your Jeep. Moreover, you can find more articles and detailed instructions about interior lights problems here on my blog. Drive safely!
Add Comment