
Adding fluid to your car’s rear differential is an important part of maintaining the life and performance of your vehicle. Differential fluid helps lubricate the moving parts inside the differential, ensuring they work smoothly and without damage. Additionally, this type of oil helps reduce corrosion by protecting metal surfaces from oxidation. Without regularly changing this fluid, you can cause severe wear and tear on the internal components of your differential, leading to costly repairs in the future. Fortunately, getting a new differential fluid into your car is not difficult and can be done quickly at home with just a few simple steps. In this article, we’ll provide you with a step-by-step guide on adding rear differential fluid so you can keep your vehicle running safely and smoothly.
Necessary Tools and Equipment
 Before you begin working on your vehicle, it’s essential to make sure you have the necessary tools and equipment. You’ll need a jack and a few jack stands to lift your vehicle to work on it safely. Additionally, you’ll need some oil catch pans to collect any old oil that may spill out during the process. It’s also essential to have a ratchet set, wrenches, an oil filter wrench, some shop rags, and a funnel for the new fluid. Finally, be sure you have the correct fluid type for your car’s rear differential before beginning this process.
Checking the Level of Fluids in Your Vehicle
It’s important to check the differential oil level inside your vehicle before adding new fluid. Not enough oil in your car can cause serious damage to its internal components and reduce fuel efficiency and performance. To check this level, locate your vehicle’s drain plug on its rear differential and remove it using a ratchet or socket set (depending on the plug type). Withdraw any excess fluid that may still be present from previous changes and then reinsert the drain plug again securely. Look at how much oil is left in your car’s differential; if it looks low, you may need to top up with some new oil before continuing with this guide. Also read about Best Oil for Jeep.
Selecting the Proper Type of Fluid
Once you have confirmed that there is a need for more fluid in your vehicle’s rear differential, now comes the time to choose which type of fluid would best suit its needs. Most cars will require externally rated synthetic gear oils with viscosities ranging from 75W-90 up to 140W-140 depending on their make and model; consult with an auto parts specialist or refer to your owner’s manual for further information regarding which viscosity would be best suited for your specific car or truck model. Additionally, many modern vehicles may require special friction modifiers or additives when refilling their fluids; make sure you purchase these alongside any applicable oils, too, so they are ready when needed during the installation process!
Steps to Change the Differential Fluid
 Now that you have all the necessary tools and products for the job, it’s time to learn how to change your car’s rear differential oil. This process should take no more than an hour to complete and is relatively straightforward.
-
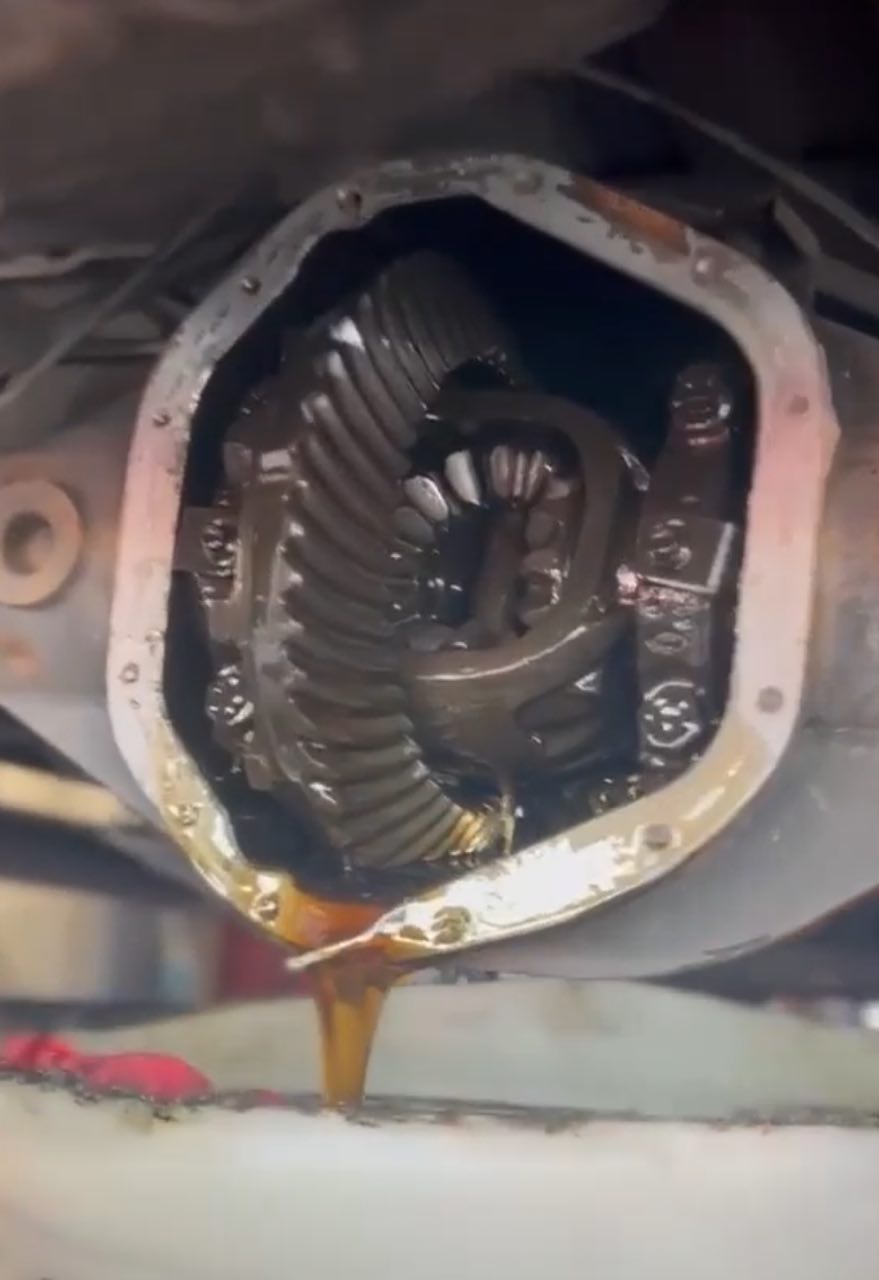
Removing old oil from the vehicle’s differential: Start by lifting your car with a jack and securely placing it on some jack stands; this will allow you access to the underside of your vehicle, where its rear differential is located. Once lifted, find the drain plug within the differential (which you should have previously identified when checking for fluid levels) and remove it completely using a ratchet or socket set. Carefully collect any excess oil in an oil catch pan or other suitable receptacle before wiping away any dirt or debris around the area with some shop rags; this will help prevent any dirt particles from entering your vehicle’s new fluid during installation!
-
Adding new differential oil: Next, take your new oil container and pour in enough fluid to reach just below the bottom of its filler neck – remember not too much, as overfilling can cause major damage! Then, slowly refill until its level matches your vehicle’s original fill line (or, if applicable, consult your owner’s manual for exact measurements). With everything in place now, secure both ends tightly – firstly by reinstalling the drain plug back into the differential casing; secondly, use the funnel provided to reattach the sealant cap near the top opening on filler neck itself – ensuring they are tightened correctly before moving onto next step.
-
Refilling with new oil and sealing up the vehicle’s differential: After you have replaced the differential oil, it’s important to ensure that your vehicle is properly sealed up. First, carefully replace any drain plugs or caps you may have removed during this process, and make sure they are securely tightened. Next, check for any leaks and seal them with appropriate sealant or gasket material if necessary. Finally, reattach all your tools and equipment back onto your vehicle before lowering it back down to the ground; this will help prevent any accidents or injuries from occurring while you work underneath your car.
Conclusion
Adding fluid to your car’s rear differential is important to keep it running smoothly and safely. A detailed step-by-step guide can simplify this process and help you avoid costly future repairs. In this article, we’ve provided you with all the information necessary to add rear differential oil to your vehicle, including what tools and equipment are needed, how to check the level of fluid in your car, choosing the right type of oil for your specific model, and finally a step-by-step guide on how to change the fluid itself. Hopefully, this article has provided you with all the information necessary for successfully adding new differential oil to your vehicle!
Add Comment