Off-road Upgrades for Emergency Situations

Are you a proud owner of a Jeep Cherokee XJ or Wrangler JK? Are you a big fan of customization and off-roading? If your answer is “Yes” to both questions, this post is for you! Today, we’ll talk about the Best Jeep Upgrades that are currently available on the market. I broke it down into four major categories: performance, suspension, interior, and exterior.
And we won’t be focusing on one single Jeep model, but rather the entire line-up. A quick note before we start: most of these aren’t necessarily must have upgrades for regular drivers. However, for “pimping out” your ride and making it ready for off-roading, they are exactly what the doc ordered. Alright, let’s jump right in and see what you can do to take your Jeep to the next level!
Performance Upgrades for Maximum Efficiency
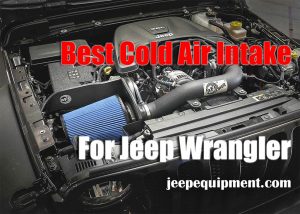
What’s the #1 thing that you wish you had more of when crawling up a steep hill? Power, of course! The factory set in Jeeps is pretty sweet. But if you want more of that “oomph”, look for third-party Jeep Performance Upgrades. So, where do we start? Personally, I always go for an aftermarket air intake system first, as I know for sure that it will give me extra horsepower and torque.
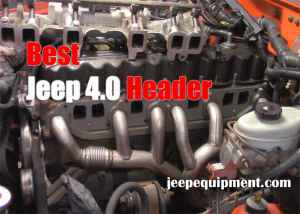
Yes, cooling upgrades can have an incredible effect and maximize your engine’s output. On average, you’ll get 10-20 extra HP and the same amount of torque. The best air intake increases airflow by up to 50%. Look for a system that is protected against rust/corrosion and come with a warranty. Moving on with our Jeep horsepower upgrades, check out some aftermarket headers.
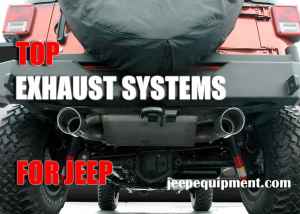
They have only one job: to maximize the exhaust flow. The stock Jeep gear can’t always handle the “heat”, especially when you push the engine to the limit off the road. They are inexpensive but do, indeed, improve overall performance. With a header, it’s important to check the sound – it should be roaring, but not noisy on highways. Also, make sure it’s leak-resistant and made of stainless steel.
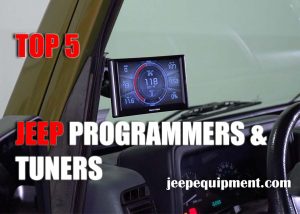
The Engine could also benefit from a tuner/programmer. With it, you’ll be able to fine-tune pretty much every aspect of your Jeep Wrangler JL, JK, TJ, YJ, or any other Jeep model. A tuner connects directly to the computer system and can deliver instant improvements even if it’s your first time doing this. Go for a big, clear touchscreen, easy controls, and preset settings.
Suspension Upgrades for Off-Roading
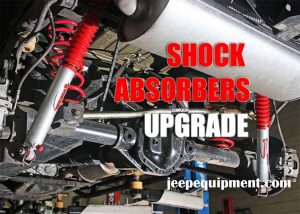
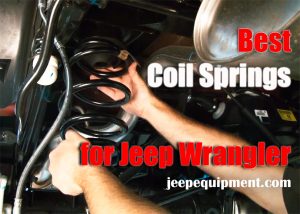
Moving up from the engine compartment, let’s take a look at the Jeep Suspension Upgrades. If you’re rocking big, off-road-friendly tires, a lift kit is a must. The best kits include shocks, bushings, coil springs, and sway bar links. Some kits also come with adjustable control arms, but, mostly, you’ll have to buy these on your own. After a lift, the Jeep’s steering will worsen, and you’ll need the arms to compensate for that.
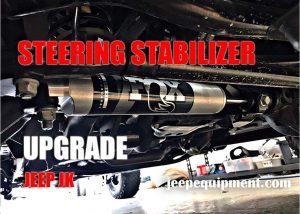
Another important upgrade for improving (or, rather, fixing) the ride quality is the steering stabilizer. Just like the name suggests, it dampens the side-to-side movement (like shock absorbers do). Going back to the tires, for them to work properly, you will need spacers. They create the necessary distance between a new set of wheels and the hub assembly.
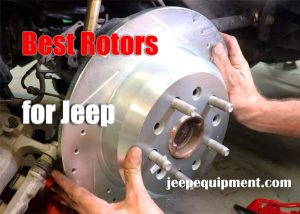
On top of that, spacers are known to improve traction on rough terrain, which makes them one of the most important Off Road Upgrades. Another important note: the bigger the tires, the harder it is for the factory Jeep brakes to “handle” them. They might lack the power to swiftly stop 40-inch (or larger) tires.
That’s why you’ll need some high-quality Jeep Brake Upgrades. The brakes consist of pads, rotors, and calipers. It’s the rotors that do all the stopping, but they won’t work without the pads applying pressure to them. And if the calipers are faulty, the breaks will always be slightly “on” which can cause the transmission to break down. Much like headers, the best breaks are protected from rust/corrosion, work silently, and perform equally well on and off the road.
Interior Upgrades: Sound, Navigation, and More
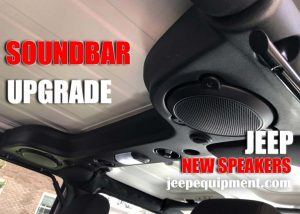
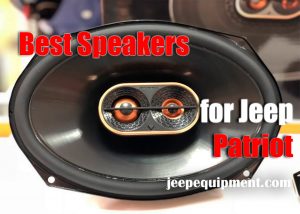
Statistically, the first thing that folks want to change/update in their Jeeps is the sound system. The factory audio system is ok, but not good enough for driving into the sunset with the windows open. If you’ve got some bucks to spare, a soundbar might be one of the Best Jeep Wrangler Stereo Upgrades. It will “stick” to the roof, look cool, and sound even better. Soundbars usually include six speakers and boast above-average frequency response.
Or, you can go with “standalone” speakers. When shopping for a pair, I look for a trendy design, high material quality (polypropylene cones and smooth silk), and a solid low-frequency (bass) output. Most Jeep drivers go for full-range speakers, as they’re very easy to install. In contrast, folks that put sound quality first purchase component speakers.

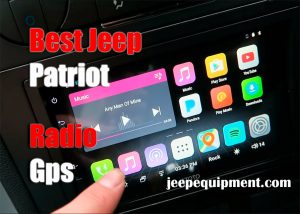
Moving on from the Audio Upgrades, I’d recommend getting a decent radio. The best radios can also connect to your Smartphone, play YouTube videos, and even include GPS navigation. For off-roading, consider getting your hands on a CB radio. With it, you’ll be able to talk to fellow drivers and get help in case of an emergency. That’s pretty much it for the hardware upgrades.
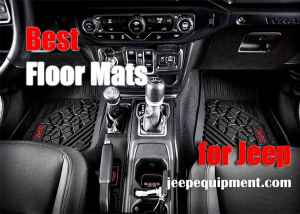
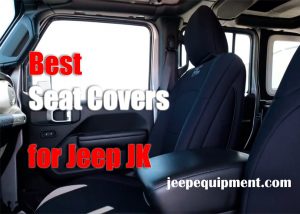
For increased safety and reliability, you can purchase floor mats and a driver’s seat. The mats must be easy to clean, made of non-slip rubber, and custom-molded for a fit. As for the seats, comfort is the most important aspect: they should be nice and cozy and easily adjustable. You can read more about various Jeep Interior Upgrades in my detailed reviews.
Exterior Upgrades for Protection and Better Looks

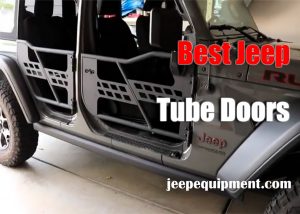
Last, but not least, let’s talk about some Cool Exterior Upgrades. For off-road driving, I recommend getting a set of tube doors. These are much smaller than the stock Jeep doors but will still keep you safe. On top of that, they provide a better view of the road, which is important when pushing through challenging terrain. The best tube doors are powder-coated and add a masculine touch.
Plus, they usually feature side mirrors. The most expensive ones even come with storage bags! Next, we have fenders liners. A quick note: inner fenders aren’t for good looks – they have a more practical and essential use. When driving through mud, dirt, and snow, a lot of that can (and does) find its way into the engine, which is always bad news. Liners will keep all of that contamination at bay.
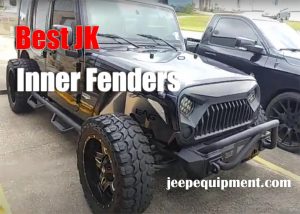
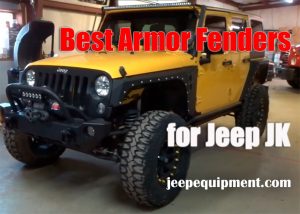
The best fender liners have hexagonal vents (for engine cooling) and fit stock and aftermarket shocks. Jeep owners in the market for something more expensive should check out armor fenders. First of all, they look pretty dope. Secondly, they will provide more protection and handle even the roughest situations. Don’t worry: fenders are very easy to install thanks to the bolt-on design.
The most expensive ones come with extensions and increase the wheel well clearance, which is very important for off-roading. Armor fenders might not fit (or look great) on a Grand Cherokee WJ, but for a JK Wrangler, they’re a God-sent! These aren’t one of those cheap upgrades, so, if you’re on a tight budget, regular fenders will have to do.
Best Upgrades for Your Jeep’s Garage
If you are a lucky Jeep owner the chances are that your garage is almost your second home. The fact is that if you are willing to work and upgrade your wheels on your own, the workstation should be fully equipped as well. These are the main upgrades for a Jeep’s garage that you should consider:
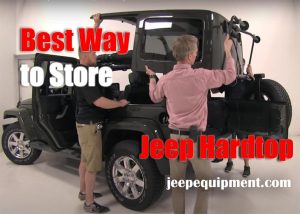
Hardtop hoist – when the time to swap the hardtop for a soft one comes, many drivers are faced with the question as to where to store the former. If you have a large garage and you are not against investing a little extra into quality equipment, then a professional hardtop hoist will come of help.
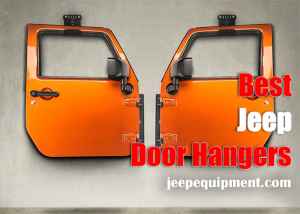
Jeep door hangers – those of you who are seriously into off-roading know how useful aftermarket tube doors are when compared to the stock ones. That is why, when the season allows it, many of you choose to take the factory doors off and install the tube ones. However, the issue of storage of those doors arises. If your garage has Jeep door hangers installed, you will forget about the storage fuss once and for all.
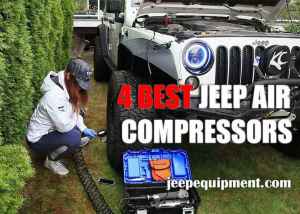
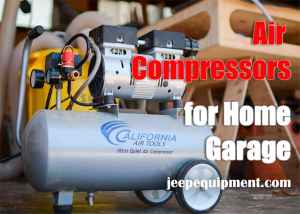
Portable air compressor – gone are the days when those were spotted on construction sights only. If you run lots of air tools, such a garage upgrade is certainly worth the investment. Besides, the aftermarket has a wide range of worthy options to consider too.
Conclusion
And that concludes my list of the best upgrades for your Jeep. We went over speaker upgrades, radios, fenders, tube doors, and a long list of performance and suspension modifications. Obviously, you don’t have to invest in every single aftermarket part that we discussed today. The best thing about Jeeps – you can perfect them exponentially, and even the tiniest upgrades will have a positive effect.
Go over the list once again, think about what you want to improve in your ride, and only then commit with your hard-earned dollars. Take care, and drive safely!

Add Comment